Huaraz is home to the mighty Cordillera Blanca, one of the highest mountain ranges in the world outside the Himalayas. With peaks more than 6000 meters high, this is the capital of Andean adventure and a trekking metropolis.
Huaraz sits 3052 meters above sea level, nestled between Peru‘s Cordillera Blanca (white) and Cordillera Negra (black), which are divided by the Santa River. It is a busy, dishevelled little town whose streets are lined with vendors and traffic, but look up and you are met with piercing glaciered white peaks sticking out through expansive valleys inviting you to plan your adventure.
Why Huaraz Is the Gateway to the Cordillera Blanca: Altitude, Geography & First Impressions
You will become familiar with Parque Nacional Huascarán, a 3400 square km park encompassing practically the entire area of the Cordillera Blanca, which you need to enter in order to do any of the treks. Its perimeters protect endangered species such as the giant Puya Raimondii plant and it is home to more than 600 glaciers and nearly 300 lakes.
Entrance is S10 per day or S65 for a 10-day pass (which is worth buying if you plan on doing more than one trek).
From completely lose-yourself-in-the-wilderness nine-day treks to slightly modest half-day tours to beautiful lakes, activities are in abundance here. If you are short of time, Laguna 69 and Pastoruri Glacier are popular day treks and will truly take your breath away, quite literally too, as altitude is above 4000 meters so make sure you’re well acclimatised before setting off.
There are local half-day hikes surrounding Huaraz, which are the best way to acclimatize.
Choose between Churup Lake or Wilkacocha (or do both). You can catch a local bus from town which takes you to the starting point of the hikes. Both are pleasant walks and serve as great training for other longer hikes. (Bring a packed lunch as there aren’t shops when you reach the top).
However, if you have more time, do not hesitate to take on the mighty Santa Cruz Trek, it was probably one of the best treks I’ve done yet.

Hiking the Santa Cruz Trek From Huaraz in the Cordillera Blanca
This moderately challenging four-day, three-night Santa Cruz Trek will take you along head-turning sights of icy emerald lakes, waterfalls and sensational views of biting peaks as you cross the Punto Union Pass at 4750 meters. You will cover a total distance of 50km and each day requires between 5-8 hours of hiking, with ascents ranging from 150 to 900 meters.
The trek can be done from two possible starting points, Vaqueria (starts at 3,700meters) or Cashpampa (starts at 2,900 meters).
Our trek started at Vaqueria.
Day 1 – Huaraz to Vaqueria & Paria Valley: Portachuelo Pass Views and a Gentle Ascent
Day one started with a 4 am wake-up call, for our 5 am hostel pick-up.
The drive from Huaraz to Vaqueria takes about 3.5 hours with a few stops on the way, the first being at a nice little spot for an optional breakfast, (optional because it isn’t included in the price of the trek).
Once our tummies were satisfied with egg sandwiches and caffeine addicts had had their fix, we hit the road again.
The trail to Vaqueria follows Rio Santa and passes by the striking lake Llanganuco eventually winding up to Portachuelo Pass, perched at 4767 meters above sea level. This is the highest point of the trip and as you can imagine offers some of the best views of the Cordillera Blanca and dazzling glacial lakes. We had a short stop at this viewpoint where we captured some magnificent photographs.

Once we arrived at Vaqueria, the starting point of the trek, we were given our first packed lunch of the trip, which consisted of an avocado sandwich, a piece of fruit and a couple of chocolate bars for energy.
As we munched on that, we couldn’t help but chuckle watching the guides chase our uncooperative runaway donkeys who refused to be saddled up.
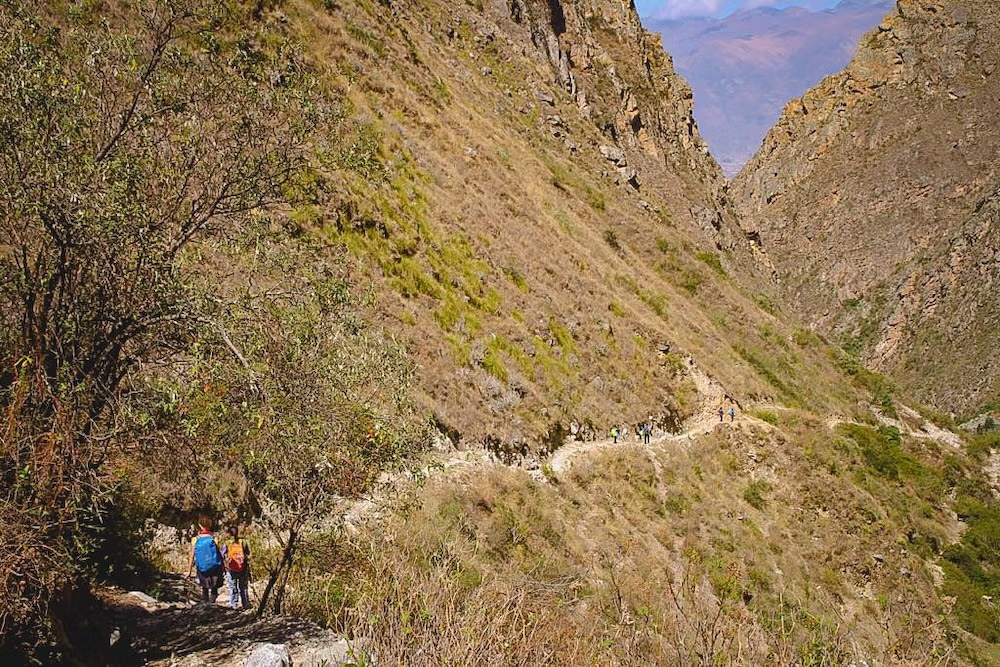
Heading out from Vaqueria is a pleasant and easy three-hour ascent through the village of Huaripama, which was our last encounter with civilisation for four days.
We passed traditional Quechua houses, mossy meadows dotted with cattle and horses and took in views of grassy valleys in the distance.
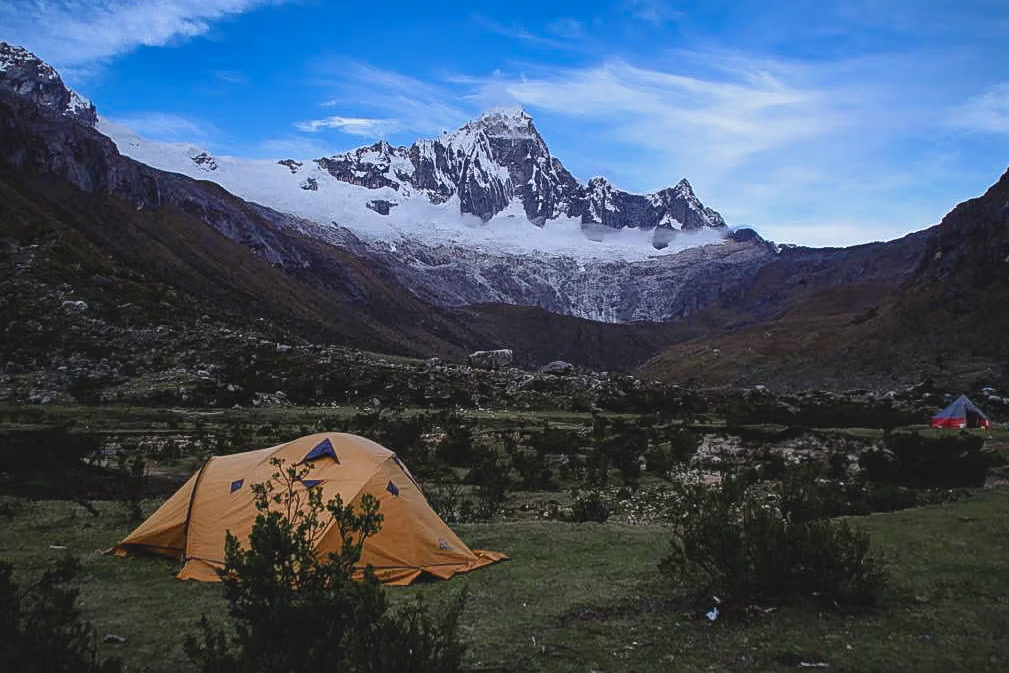
We continued to follow the Quebrada Huaripampa trail to our first campsite at Paria Valley, set 3850 meters above sea level and plotted next to a chilly little stream.
Most of the tents had already been set up when we arrived so we unpacked some bits and huddled up in a teepee tent for tea and biscuits as the chef prepared dinner.
The cold was creeping up as the night drew in so we devoured the entire pot of hot tea to keep warm.
Around 6 pm the much-anticipated dinner was served and we weren’t disappointed.
A starter of hot pasta soup with veggies followed by rice and beef (or an omelette as an alternative for vegetarians). Nobody was left feeling hungry and we thoroughly enjoyed our first warm meal of the day.
Each night after dinner we gave our guide our empty bottles to fill with boiled water from the stream ready for the following day. It hadn’t been the longest day of trekking, but we were tired and had an early start so shortly after dinner we hit the sack.
I must admit, nobody was jumping up and down about the camping equipment, some of the tents were a little damp and the sleeping bags were not adequate for the temperature drop at night. This was the only time I wished we had lugged along our own sleeping bags, so if you have your own bring it, otherwise hire a good one in town.
Although I wasn’t completely freezing, I was cold enough to not pass my first night with sweet dreams.
Day 2 – The Push to Punta Unión (4,750 m): Weather Swings, Thin Air & Big Wins
The highly anticipated day two was an early start, but the tasty breakfast of pancakes with a few spreads to choose from with coffee and tea worked well to wake us up.
Packed lunch in the rucksack, we kicked off with a gradual incline through the Huaripampa Valley and all I could think was ‘please let it continue like this’.
It was quite a cloudy day so there wasn’t much in the way of views but I was too preoccupied with what lay ahead anyway.
As we walked, every so often we would ask our guide ‘are we at the hard part yet?’ ‘Not yet’, she’d reply, and we continued. We all just wanted to get it over and done with.
We learnt that this trail was used in pre-Columbian and colonial times for transporting goods from the eastern side of the Andes to the main valley. It’s difficult to imagine how they managed as we watched our poor donkeys struggle with the wet, rocky terrain, slipping numerous times under the weight of our luggage.
Two hours into the trek, it started. And I mean really stared.
The ascent, the snow, the rain, the wind, the cold and did I mention the snow!?
One step at a time, oxygen depleting with every gait, we somehow pushed through the most aggressive part of the final ascent and reached Punta Union at 4750 meters.

High fives all around and snaps for evidence!
What would be panoramic views from both sides on a clear day, was unfortunately just haze and clouds for us.
Stretching east from the pass is a long valley of azure lakes with walls of white waterfalls. To the west are intense edges of glacier coated rock and ice with ragged peaks crowned with snow, the highest of which is Huascaran, 6,768 meters high.
Sadly we just had to believe it was all there, for visibility was poor.
To be honest, I was just happy to have reached the top.
This treacherous, most difficult part is actually only one hour long, but it felt like a lifetime. Some made it a little faster than others, but our guide kept everyone at a similar pace, always ensuring no one was too far behind or ahead.
Altitude Management on the Trail: Headaches, Hydration, Coca Leaves & Medication
From Punta Union it was just downhill, but for me, it wasn’t over. The headache kicked in after the highest point and as we descended it got worse. Our guide gave me Acetazolamide (typically used to treat altitude sickness), but it didn’t seem to have much effect. I thought I had done everything right, drank plenty of water, chewed bundles of coca leaves, took several days for acclimatisation, I guess some just aren’t lucky with the altitude.
Anyway, it wasn’t so bad that I couldn’t continue and as we descended further, the clouds thankfully made little way to reveal another stunning lake where we sat admiring the power of nature which encompassed us.
It was a good time for a snack too, so I munched on one of my many chocolate bars.
Lunchtime was never at a designated hour. We took several breaks during the trek and just snacked on random pieces from our lunch box whenever we felt hungry.
The contents varied very little on a daily basis, it consisted of a simple sandwich with cheese, ham (or cheese again if you’re a veggie) or avocado, a piece of fruit and several different chocolate bars and biscuits every day (so we weren’t short of sugar).
Camp 2 – Taullipampa (4,250 m): Iconic Peaks, Golden Hour & the Best Night Sky
Camp number two, Taullipampa, (a few more hours downhill) was nestled in a gorgeous meadow at the foot of the majestic Nevado Taulliraju (5830 meters). We were pitched at 4250 meters, which meant a colder night than the previous one.
I couldn’t notice much of the camp’s surroundings right away, the altitude had really gotten the better of me and the only thing that helped was a retreat to my nest.
Waking up, I peered my head out of the tent and gazed up 5600 meters at the picture perfect Nevado Paria.
In the other direction, paramount pictures’ live-action logo, Artesonraju mountain majestically filled the background.
There was something mystical and overwhelming about every mountain and it was clear that this was the most picturesque campsite.
Once again hot tea awaited us in the teepee tent with an overflowing bowl of popcorn, the perfect snack for our card games.
The sun started to set just before dinner and we all frantically grabbed our cameras to capture the continually changing impressive colours of the mountains.
Dinner came at the perfect time, a much-welcomed piping soup, followed by a traditional Peruvian dish of Lomo Saltado (a stir fry of marinated strips of sirloin with onions, tomatoes and spices served with rice and fries).
Every night before dinner our guide briefed us on the following day’s route. This evening she gave us the option to wake up earlier and visit Lake Arhuaycocha (4450 meters), which apparently boasts one of the most spectacular views within the Cordillera Blanca (on a day with good visibility).
Those who were keen would go unguided (and a little rushed from what I could tell) and meet everyone else at the said meeting point. Diverting to the lake sounded pretty straightforward, but it would have meant an additional two hours of trekking to the already six-hour day, so the team was divided in opinion.
We decided to leave the final decision up to nature, so if we woke up to a sunny day we would go.
Day 3 – Taullipampa to Llamacorral: Long Scenic Valley Walks, Lakes & Waterfalls
Well, that didn’t happen. Morning came and visibility didn’t stretch past the tent next door, so everyone decided to go forward together and skip the lake.
Day three is a sort of reward day if you like, an easy but long hike through spectacular mountain scenery, small waterfalls, perfectly coloured lakes and interconnected mashy areas.
For the first part of the walk the bad weather followed us and when we arrived at the Arhuaycocha Alpamayo viewpoint (about an hour from the campsite, last 30 minutes slightly uphill), we found ourselves amongst thick fog, but took a group photo anyway and then quickly retreated to the path towards the final campsite. On a brighter day expect to see jaw-dropping glacier lakes down below.
The latter part of the trek brightened up and we were able to enjoy some much needed blue skies and spectacular mountains, coloured differently under the suns rays.
The rest of walk was through a gorgeous valley along a peacefully flowing river.
We reached the last campsite, Llamacorral, by late afternoon and it was a very pretty site. It‘s situated amongst forest-like surroundings with trees, bushes and of course the standard stream for our water supply.
After a little rest, we gathered for the final meal together, another tasty soup and a filling main of spaghetti bolognese.
Being our last night together we went hard and socialised over a few more rounds of cards, but tiredness soon took over so we headed for the ultimate night’s sleep in tents!
I was ecstatic to conclude sleeping on the floor.
Day 4 – Descent to Cashapampa: Santa Cruz Canyon, Sunlit Forests & Finishing Strong
How wonderful it was to wake up to sunshine on our last day. No rushing, we could enjoy a delicious breakfast of omelette filled with cheese and tomatoes and leisurely get ready to conclude our journey.

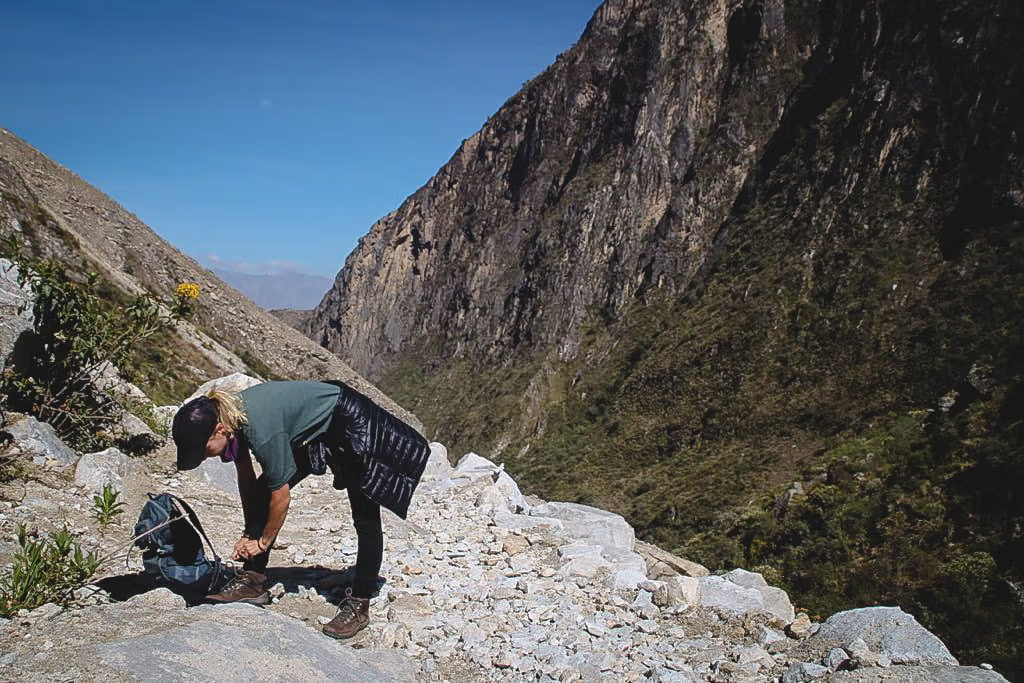
The trail to Cashapampa was a two hour steep-ish decent down Santa Cruz canyon, and not the kindest to the knees.
The scenery on day four was more dramatic, with vibrant green colours and a lot more vegetation, the sun definitely brightened up the landscapes.
The path flattened out at various points as we walked along the Cashapampa river, occasionally splashing our faces with the icy water to cool off.
Two or so hours later we made it! Back to civilisation and feeling very proud.
We arrived at Cashapampa before midday and received our final packed lunch as the guides unloaded the donkeys with our stuff.
We set off shortly after and it took us between 2-3 hours to get back to Huaraz.
The Santa Cruz Trek ranks highly amongst trekkers and it’s easy to see why. Yes, there are difficult parts, but these parts are short-lived and are outweighed by the incredible feeling of being so up high amidst some of the most beautiful mountains in the world.
Here are some tips to make your adventure more enjoyable.
Tips for hiking the Santa Cruz Trek
- We booked with an agency called Peru Diamond and paid 300 soles per person (not including park entrance, which is S10 per day).
- The first day’s breakfast is not included in the price
- Other companies charge more because their equipment is better, but meals are the same
- If you go with a cheaper company try to buy/rent your own sleeping bag
- Bring enough water for the first day, but water for cooking and drinking is available from rivers at base camp which the chef will boil for everyone each night, ready for the following morning
- Total distance of trek is 50km
- Highest trekking point 4750 meters
- Difficulty: moderate – difficult
- Best time to go: May to Sept, otherwise you might encounter rainy season and it’s really not that pleasant
What to pack for the Santa Cruz Trek
You can take a 5kg bag, which the donkeys will carry, but you’ll also have your daypack, which you will carry at all times. Things to bring on the Santa Cruz trek include:

- Cash
- Hiking boots
- Trekking socks
- Trekking pants
- Sun hat and warm hat
- Warm layers to sleep in (preferably thermals), warm socks for sleeping
- Sunglasses
- Headlamp
- Sunscreen
- Camera
- Toilet roll
- Hand sanitizer
- Long poncho or waterproof jacket
- A deck of playing cards
Bonus Santa Cruz Travel Tips: Routes, Acclimatization, Gear, Safety & Prices
Start Right: A Simple Acclimatization Ladder (That Still Lets You Explore)
High Andes trips are won or lost before the first switchback. Use Huaraz as your pressure-free staging base and climb your sleeping altitude gradually. If you have five days to spare, this ramp works well:
Acclimatization Ladder (Huaraz Base, 3,052 m)
| Day | Target | High Point | Tiny Tip |
|---|---|---|---|
| 1 | Huaraz easy day | 3,100–3,300 m | Walk the malecón by Río Santa at sunset; hydrate, early night. |
| 2 | Wilcacocha half-day | ~3,900 m | Taxi up, walk down; test layers & boots without stress. |
| 3 | Laguna Churup day hike | ~4,450 m | Snack at the lake 20–30 min; then descend, don’t linger high. |
| 4 | Huaraz “admin day” | 3,100 m | Fit rental gear, shop snacks, gentle town stroll only. |
| 5 | Optional stretch: Laguna 69 | ~4,600 m | Only if you felt great on Day 3; otherwise, rest & pack. |
Where to Stay in Huaraz
Huaraz is compact, so location matters less than which kind of trip support you want going in and out of the mountains:
- Hotel Churup — a longtime favorite among the international trekking crowd. Staff are used to arranging secure luggage storage while you’re out on the trail, plus laundry and a fireplace to swap trail stories in the evenings. A solid mid-range pick for solo trekkers or pairs.
- Albergue Churup — the more budget-friendly hostel-style sibling option in town, popular with backpackers wanting the same trekker-focused logistics support without the higher price tag.
- The Lazy Dog Inn — a mountain lodge set outside the city with valley and peak views, better suited to a splurge stay before or after your trek than a walkable in-town base. Good for couples wanting a quieter, more scenic recovery spot post-trek.
Book the Trek: Guided Tour Options
If you’d rather lock in logistics before arriving in Huaraz rather than shop around agencies in person, a handful of operators run the same route with donkeys, meals, and a guide included:
- Santa Cruz Trek: 4-Day Guided Tour — covers the full Vaquería-to-Cashapampa route with meals, transport, and tents included, run as a small group.
- 3-Day or 4-Day Santa Cruz Trek from Huaraz — a flexible option letting you choose the shorter or longer version of the same route, with donkeys carrying gear and camping supplies.
Either way, book or confirm current pricing directly — trek costs and inclusions shift by season and operator.
The Route at a Glance (Vaquería ➜ Cashapampa)
You already lived the long version. Here’s the bird’s-eye view, with timings and where to save energy.

Day-by-Day Track Plan (4 Days / ~50 km)
| Day | Start → End (sleep alt.) | Hours on trail | ↑ / ↓ (approx.) | Highlights | Tiny Tip |
|---|---|---|---|---|---|
| 1 | Huaraz → Vaquería drive → Paria Valley (3,850 m) | 3–4 hiking | ↑ ~600 m | Village life in Huaripampa, first big valley views | Eat half your lunch early; slow burn trumps sugar spikes. |
| 2 | Paria → Punta Unión (4,750 m) → Taullipampa (4,250 m) | 6–8 | ↑ ~900 m / ↓ ~500 m | The pass! Glacier walls, high bowls, moody cloud drama | Set a turnaround pace: tiny steps, few words, big lungs. |
| 3 | Taullipampa → valley traverse → Llamacorral (3,760 m) | 6–7 | ↓ ~500–600 m | Waterfalls, teal lakes, braided marsh | Foot tape on hot spots at lunch, prevention wins Day 4. |
| 4 | Llamacorral → Cashapampa trailhead → Huaraz | 2–3 walk + drive | ↓ ~900 m | Canyon walls, warm river air | Poles shorter for steep descents = happy knees. |
Guided vs. Self-Supported (the Honest Trade-Offs)
Go with a local agency if you want donkeys, cooks, fixed camps, and the headspace to just walk. You’ll pay for logistics, but dinner appears like magic and you carry only a daypack. Bring or rent your own sleeping bag even if an agency includes one — your warmth is not where you gamble.
Go self-supported if you’re experienced with high, cold camps and love picking your own pace and pitch. You’ll still need to purchase your Parque Nacional Huascarán permit (a multi-day pass is better value if doing more than one hike — check current rates locally, as these change), arrange transport to Vaquería or Cashapampa, carry all food and fuel, and navigate the established trail. Wind at the pass and cold valley nights punish underprepared gear choices — pack like you’ll actually be out there, because you will.
Hybrid option: hire donkeys or an arriero to carry group gear but cook your own meals. It keeps costs sensible and camps less crowded.
Water, Food & the “Don’t Bonk” Plan
- Water: your cook or guide will boil from streams nightly. If independent, melt/boil or use a filter plus chemical backup — glacial silt clogs cheap filters fast, so let it settle in a bottle first. Carry 2 L minimum on the pass day; refill whenever the route meets the river.
- Electrolytes: altitude blunts thirst, so set a timer to sip. Add a pinch of salt and a squeeze of lime powder to one bottle.
- Snacks: keep it simple and non-crumbly — chocolate biscuits, peanuts, dried mango, hard candy. A snack every hour keeps the mood human.
Camp meals that work:
Night 1: soup + rice/veg/omelette; Night 2: soup + lomo saltado (or veg sauté); Night 3: soup + spaghetti. Aim for warm, salty, and simple — that’s what your body digests well at altitude.
What to Wear (and When)
Think three layers: a moisture-moving base, a warm mid, a weather shield. Then add sleep layers that never hike — dry stays warm.
High-Altitude Comfort Gear Notes
| Item | Why It Helps | Use It When |
|---|---|---|
| Buff or neck gaiter | Blocks wind, doubles as sun guard | Pass day gusts, dusty valleys |
| Light liner gloves + mitt shell | Fine motor control + instant warmth | Punta Unión, pre-dawn starts |
| Puffy jacket (hooded) | Warmth without weight | Camps, tea tent, long breaks |
| Rain shell (long) | Cuts wind & drizzle, doubles as a seat on wet rocks | Cloudbursts, pass shoulder |
| Trekking poles | Save knees on long downs; steady on snow | Day 2 descent, Day 4 canyon |
| Camp shoes (crocs/flip-flops) | Let boots dry, feet breathe | Afternoons, midnight bathroom runs |

Weather & Season Smarts
- Best window: the dry season, May–September, brings crisp mornings, clear skies and frosty nights.
- Shoulder months: October and November can be stunning but expect surprise showers and cloud cover.
- Rainy season: roughly December–April; trails are quieter but mud and low visibility can make for a tougher trip.
Wind rules the pass. If gusts pick up early, layer up and shorten your poles. If thunder shows up, get low — Santa Cruz is high but not a place to court a lightning strike.
Altitude: Prevention Beats Heroics
- Hydrate, nibble, pace. A conversational walking rhythm is the right rhythm. If you can’t talk, you’re moving too fast.
- Coca leaves or tea can be a useful ritual; acetazolamide helps some people — talk to your doctor at sea level before you go.
- Sleep low when possible. You can climb to 4,750 m, but settling in near 4,250 m for the second night is where the real recovery happens.
- Red flags: worsening headache, nausea, wobbliness, confusion. Tell your guide early. Descent is the cure; pushing through is not worth the risk.
Donkeys, Ethics & Leave No Trace
- Weight limit: around 5 kg per person on the donkeys is a kindness, not just a number. Respect it.
- Pack soft, not sharp. Protect the animals’ sides; keep fuel and bottles sealed and clean.
- Waste: carry out toilet paper and hygiene wipes in a zip bag. Use established toilet pits at camps where provided; otherwise dig a cathole 15–20 cm deep, at least 70 m from water.
- Fires: none — the landscape is fragile.
- Buy local: snacks, bread, and a post-trek lunch in Cashapampa put soles into the valley that hosts you.
Santa Cruz Trek FAQs: Your Essential Guide to Trekking Peru’s Cordillera Blanca
The Santa Cruz Trek is one of Peru’s most breathtaking multi-day hikes — emerald lakes, glaciated peaks, and a high-altitude pass that challenges and rewards in equal measure. Here are the questions travelers ask most when preparing for this Andean adventure.
How difficult is the Santa Cruz Trek?
It’s moderate to challenging, depending on your fitness and acclimatization. You’ll hike about 50 km over four days with daily ascents of 150–900 meters and cross Punta Unión Pass at 4,750 m. The terrain varies between valleys, rocky trails, and some steep climbs, but the toughest stretches are short and manageable if you pace yourself.
What’s the best time of year to hike the Santa Cruz Trek?
The dry season (May–September) offers the best conditions: crisp mornings, sunny days, and starry nights. October and November can be stunning too, but expect some cloud and surprise showers. The rainy season (December–April) is less ideal due to muddy trails and poor visibility.
Do I need to acclimatize before starting the trek?
Yes. Huaraz sits at 3,052 m, so spend at least 2–3 days acclimatizing before starting. Popular warm-up hikes include Laguna Churup and Wilcacocha, which let your body adjust gradually. Altitude issues can derail a trek fast, so don’t skip this step.
Should I hike the Santa Cruz Trek with a guide or independently?
Both work. Guided treks include donkeys, cooks, camps, and logistics, letting you focus on the walk. Independent trekking is cheaper and more flexible but requires carrying all gear and food and knowing the route. A hybrid option — hiring donkeys but self-catering — is also popular.
How cold does it get at night?
It can drop below freezing, especially at the Taullipampa campsite (4,250 m). A proper four-season sleeping bag, thermal base layers, and a good beanie make a real difference. Even if your agency provides gear, it’s worth bringing or renting your own quality sleeping bag in Huaraz.
What should I pack for the trek?
Pack light but smart: sturdy hiking boots, layered clothing, a waterproof shell, sunscreen, a hat for sun and another for warmth, a headlamp, toilet paper, and snacks. You’ll carry a daypack, while donkeys can take up to 5 kg of extra gear. Don’t forget a deck of cards for chilly evenings in camp.
How’s the food on the trek?
Surprisingly good. Guided treks typically include hot soups, Peruvian classics like lomo saltado, spaghetti dinners, and packed lunches with sandwiches and chocolate bars. If you’re trekking independently, plan simple, warm meals that cook easily at altitude — soups, rice, pasta, and high-calorie snacks.
What about water along the trail?
Guides usually boil water from streams every night for the following day. If trekking independently, bring a filter or purification tablets and let glacial water settle before filtering. Carry at least 2 liters for the pass day and sip steadily, since altitude dulls thirst.
How do I deal with altitude sickness on the trail?
Hydrate constantly, walk slowly, and snack often. Coca tea or leaves help some hikers, and acetazolamide (Diamox) may help prevent symptoms — consult your doctor before the trip. If headaches worsen, tell your guide early. Descent is the ultimate cure, so don’t push through severe symptoms.
What kind of wildlife and scenery can I expect?
Azure lakes, cascading waterfalls, and jagged snow-capped peaks towering above lush valleys. You may spot Andean condors, hummingbirds, or vizcachas along the way. Punta Unión Pass is a highlight, offering panoramic views in every direction on a clear day.
How long is the trek and what’s the daily hiking like?
The trek covers roughly 50 km over four days, with 5–8 hours of hiking each day. Day 2 is the hardest with the climb to Punta Unión, but the real “grunt work” is only about an hour of it. Days 3 and 4 ease off with scenic valley walks and a final descent through Santa Cruz Canyon.
Is the Santa Cruz Trek worth it?
Without a doubt. Between the soaring Andean peaks, glacier-fed lakes, and the rush of standing at 4,750 m, this trek delivers what a classic mountain adventure should. It’s physically challenging but accessible, and the sense of accomplishment at the finish is hard to match.
Have you done the Santa Cruz Trek?
Tell us about your experience!
Hey selma! I am really struggling with myself if i should do the Santa Cruz trek now in the middle of january as people keep telling that the weather is really not good and you probably have no view at all. Do you still recommend it to do it at this time of a year? Where the nights -and days – nit to wet and cold and view covered by clouds?
Thanks for your opinion!
Hi Nadja,
It’s hard to say, is this your only opportunity to do it? If not, I would arrange it for another time. If it is your only opportunity, I wouldn’t miss it!
It’s a 4 day day trek so hopefully you would at least have a few visible days.
The night are cold, so make sure you have a great sleeping bag and warm clothes.
Hope that helps a little, enjoy Peru!! 🙂